Picture a site where every article sits behind one flat monthly fee. Pay once, get it all. Many WordPress publishers use this fixed subscription. It’s simple, but strict. Pay up front or move on.
Now imagine a smarter gatekeeper. An AI-driven paywall adjusts access and price by reader and moment. It decides who sees what, when, and for how much. No more one-size-fits-all. It tailors unlocks to fit interest, timing, and intent.
Paywalls usually work in three clear ways. A hard paywall blocks everything unless someone subscribes. Fixed subscriptions open most doors for a recurring fee and treat every visitor the same. An AI-driven model applies rules that shift access and pricing. It looks at the article someone wants, visit frequency, and even traffic spikes. Some posts go up for individual purchase at different prices. Others show partial previews, which helps with search while still protecting value.
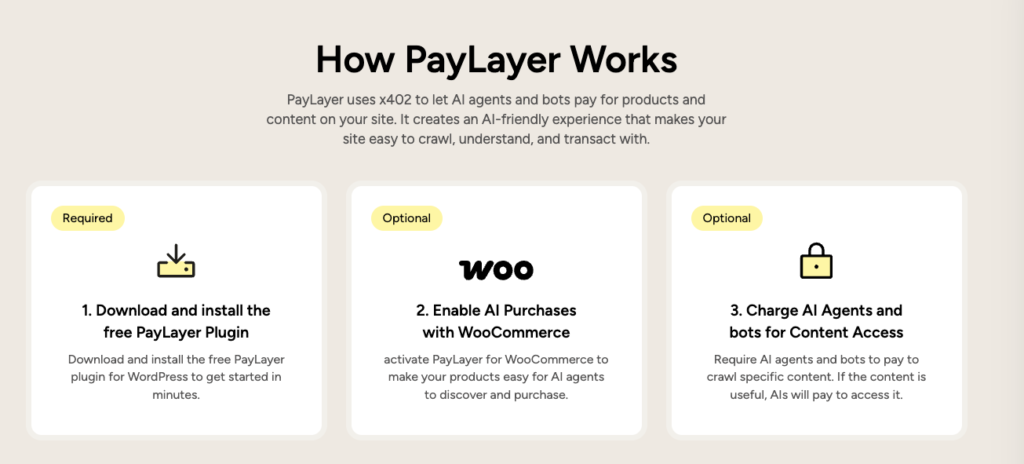
Here’s what AI helps with right now. It controls who gets through the gate. It sets dynamic prices for single pieces or bundles. It offers short previews instead of full unlocks. Tools like the PayLayer plugin for WordPress power these moves. It doesn’t write personalized articles or guess the future. It focuses on actions teams can roll out today.
There are trade-offs. Checkout steps may add friction. Conversion rates vary by article. Bounce rates rise when people hit a wall. Refunds pop up when access fails. Support teams need clear guidance on permissions and account issues.
Plan your paywall rules and prerequisites before you install
Technical baseline
Start with a solid WordPress setup. Version 6.4 or higher keeps plugins compatible. HTTPS protects payments and builds trust. Run PHP 8.1 or newer to support modern code without errors. Make sure there’s full admin access because plugin installs and activations need it. Confirm the host allows outbound web requests, since payment APIs rely on them.
Content inventory step
Decide what lives behind the paywall and what stays open to attract new readers. Use clear tags or categories like “premium” and “free” so the paywall plugin can apply rules. Set a preview length that works for both readers and search. A 150 – 300 word teaser gives context, keeps SEO healthy, and invites people to pay for the rest.
Payment readiness
Create a Stripe account, or another processor that fits the plugin, before launch. Start with test keys to validate checkout flows. Choose a primary currency based on audience location. Set minimum per‑article prices in the $0.49 to $2.99 range, which suits impulse buys and still values the work. Define refunds upfront. A short window, like 24 hours, reduces hesitation while limiting abuse.
Privacy checklist
Be clear about data collection tied to pricing and access decisions.
- IP addresses support location‑based pricing or restrictions.
- Device info helps confirm compatibility.
- Prior purchase history enables tailored offers.
State how long data is retained and why. Provide a simple opt‑out for non‑essential data. Map these steps to GDPR and CCPA requirements to stay compliant.
Set up PayLayer in WordPress for per‑article access and dynamic pricing
Setup starts in the WordPress dashboard. Go to Plugins → Add New, search for “PayLayer,” then click Install and Activate (You can also download the PayLayer plugin from the official PayLayer website.. If the plugin ZIP came from PayLayer.org, use Plugins → Add New → Upload Plugin, choose the file, and activate it. After activation, a Settings item named PayLayer appears in the menu.
Enter API keys from the PayLayer dashboard. Switch between live and test modes based on whether real payments are ready or the team is still checking flows. Choose a default paywall style next. Per-article purchase mode fits sites that want readers to buy individual posts instead of broad subscriptions. Pick a preview type that fits the content: a percent of each post, a fixed word count, or custom blocks that surface key sections. Set fallback behavior for API issues – either show previews only or block access so visitors get a clear, consistent experience.
Dynamic pricing rules add control over revenue. Set a base price, for example $0.99 per article. Offer loyal readers lower rates after three purchases, such as $0.69, as a thank-you. Use surge pricing during traffic spikes, like $1.49, to capture value when demand jumps. Run time-based promos that drop prices after two weeks, down to $0.59, to convert late buyers.
Access tokens keep paid access smooth. A seven-day window lets buyers revisit unlocked articles on the same device without paying again. Keep sharing in check by capping each purchase token to three unique IPs or device fingerprints.
Email receipts include one-click links that reopen purchased content without another password step.
Use shortcodes and templates to add metered, partial, and per‑article gates
Set the metered paywall by choosing how many free articles a visitor gets in a fixed window. In PayLayer’s Rules, a common choice is “3 free views per user every 30 days.” First‑party cookies and server logs keep the count accurate. Private browsing needs careful handling, since it hides state. Treat those sessions conservatively to avoid blocking real readers by mistake. A 30‑day reset keeps access fair and nudges subscriptions without feeling punitive.
Premium pieces sometimes warrant special pricing. Set per‑article overrides in the post editor with the PayLayer meta box. Editors assign a custom price for a major investigation or a deep guide, and that price appears in the paywall modal and on email receipts. Readers know the cost up front and after purchase, which builds trust.
Shortcodes make partial gating straightforward. Wrap teaser copy in [paylayer_preview], then protect the rest with [paylayer_lock]. RSS only delivers the preview, and search crawlers see enough to index without exposing full content. Server‑side rendering applies the rules, so client tricks don’t leak paid sections.
Template integration slots the paywall into single.php or block theme files. A simple pattern inserts a PayLayer block after paragraph three, based on whether a visitor is logged in or anonymous:
php global $post; $content = apply_filters('the_content', $post->post_content); $paragraphs = explode("</p>", $content); if (count($paragraphs) > 3) { // Insert paywall block after third paragraph array_splice($paragraphs, 3, 0, '[paylayer_lock]'); } echo implode('</p>', $paragraphs);
Caching often creates mismatches between locked and unlocked views. Use DONOTCACHE_PAGE or PayLayer’s built‑in flags to skip cache on protected fragments. Tests should compare two paths: a logged‑in subscriber who sees full content, and an anonymous visitor who hits the paywall. This confirms accurate access across real scenarios.
Test your setup, watch the trade‑offs, and refine your AI paywall
Testing a new paywall works best with real scenarios, not theory. Stripe’s test cards simulate purchases, refunds, and expired links. They expose issues before paying readers ever hit them. Intentionally slow the API response to see whether fallback modes keep pages usable or leave visitors stuck. Run accessibility checks with keyboard-only navigation and screen readers to prevent accidental lockouts.
Launch week is prime time for hard numbers. Track how many visitors hit the paywall and how many buy. Compare average price paid to the base rate to gauge whether discounts drive sales or erode margin. Watch exit rates on paywalled pages, since spikes often signal friction or unclear value.
- Impression-to-paywall rate
- Paywall-to-purchase conversion
- Average price realized vs base price
- Exit rate on paywalled pages
- Alert if conversion drops more than 30% after rule tweaks
A few setup issues trip up even seasoned teams. Full-page caching may leak unlocked content if cache vary headers aren’t configured or if the plugin integration isn’t enabled. Previews cut too short hurt SEO and undermine reader trust. Surge pricing set too aggressively scares off loyal buyers who expect consistent, fair terms.
Some stacks blend WordPress content with Shopify for sales. Keep article purchases inside WordPress, then route Shopify email confirmation links straight back to the paywalled posts for a smooth handoff. Set up cross-domain tracking so revenue attribution stays accurate without double counting.
Small tests beat big swings for pricing and gating rules. Let the data drive changes. Explain what’s behind each gate with clear, plain copy. Privacy-first defaults protect user trust and help satisfy compliance.
Choosing a WordPress paywall plugin for AI-driven access is only the start. Ongoing tuning, measurement, and care turn a tool into dependable revenue for publishers.